
Make bronze-framed glass, then turn it into a thin window panel. Give the panel its own recipe: one glass block becomes four panels in the stonecutter. This is a separate tutorial project that you can change while keeping your installed Glassworks Atelier intact.
Three editors share the work. The texture editor stores layered artwork; the constructor connects block properties and recipes; its built-in shape editor makes the block thin. The simple drawing below teaches the method rather than reproducing every detail of the original set.
Start a separate project
Open the constructor. If another project is open, first choose “Project” → “Save project JSON”. Then choose “Project” → “New project”, “Mod / addon”, Bedrock 26.52 and “Create project”. This profile supports the material and shape used here; keep it throughout the exercise. The original installable addon's compatibility is beside the Glassworks Atelier download.
In “Project settings”, enter Bronze Window Workshop as the name, gw_panel_lesson as “Project ID”, 0.1.0 as the version and your own author name. A new project receives a separate pack identity; the different ID also separates its blocks from glassworks_atelier. Start this lesson with a new project rather than opening the original set's source.
Artwork: separate the glass and frame
- In the texture editor, select “New project”, “Block texture”, 16 × 16 and “Starting canvas” → “Blank canvas”. Name it Bronze Window · Lesson.
- Rename the lower layer Glass tint. Fill the blank canvas with #afd9d4 and set “Opacity” to 20%. When changing an existing drawing, add a blank layer first: Fill changes only a connected area of the same colour.
- Add a Bronze frame layer at 100% opacity. With “Rectangle” and a 1 px brush, draw a dark #3b4948 outline from pixel 1, 1 to 16, 16, then a bronze #b28a56 outline from 2, 2 to 15, 15. The pixel counter starts at one.
- Dragging previews the outline; release to draw it. Escape cancels the preview. With the keyboard, Space sets the start, arrows move the end and a second Space draws. Dragging in the 3D window rotates the view.
- Save the project and download an editable backup with layers. A PNG transfers the finished artwork but does not retain separate layers. “Open artwork project” in the library returns to a saved drawing.
Keep the frame on its own opaque layer. Reducing its opacity with the glass makes the frame faint too. “Save project” keeps the drawing in this browser library; the downloaded editable project transfers the layers as well.
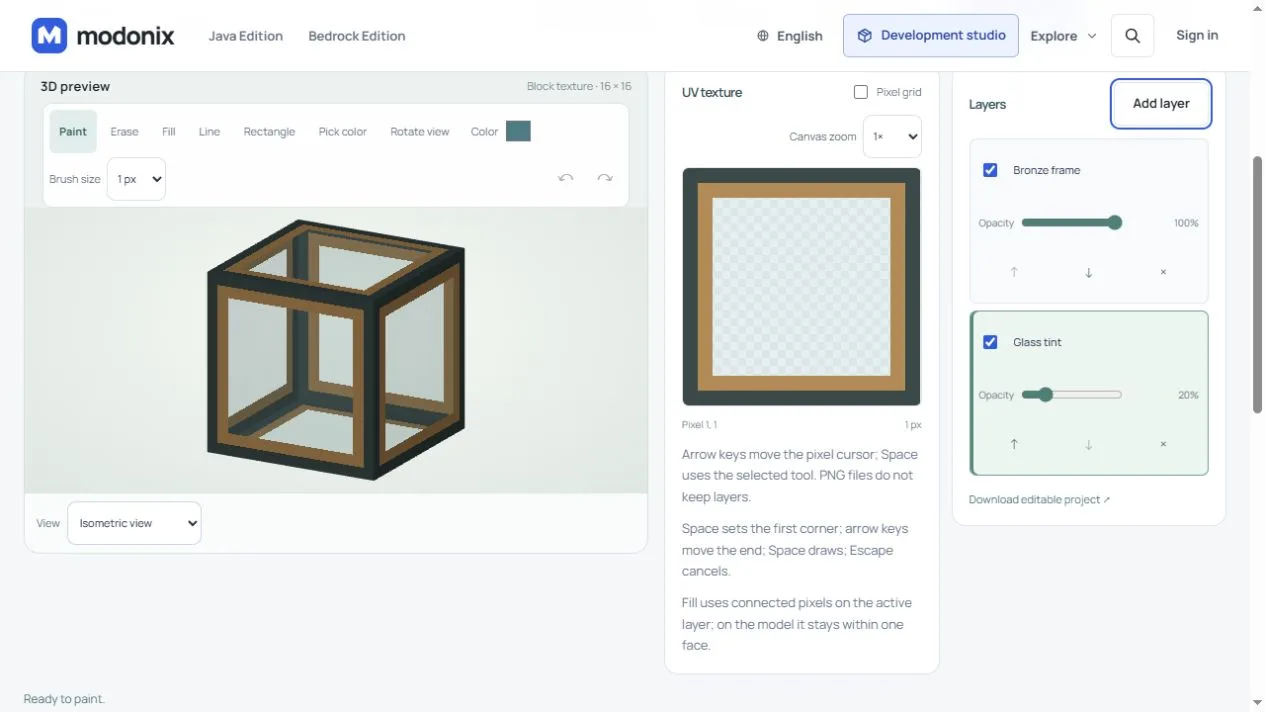
The tutorial glass and opaque frame use separate layers.
Block: copy the artwork and set its material
Return to the tutorial project you created in the constructor. Keep “Mod / addon” output: this exercise adds new blocks and recipes. “Resource pack” replaces existing game textures.
Add Lesson Bronze Glass with the ID lesson_glass. Open “Copy saved texture” and choose Bronze Window · Lesson. Use the same browser, browser profile and website where the artwork was saved. The library does not automatically move between a local site and Modonix, different browsers or devices. If it is missing, save it in the texture editor and select “Refresh saved textures”. Importing the downloaded PNG is another way to transfer the artwork.
Choose “Translucent · tinted glass” for “Block material”, 0 for “Light blocking” and 0 for “Light level”. Translucent retains soft PNG transparency. “Cutout · clear openings” suits a grille with crisp holes; brick and stone need completely filled artwork and “Opaque · solid surface”.
Artwork transparency, light blocking and light emission are separate settings. This window emits no light. A translucent material cannot turn fully painted PNG pixels into a transparent centre: fix Glass tint and copy the drawing again. Cutout makes hard openings rather than retaining the soft transparency of tinted glass.
Copying transfers a snapshot of the artwork. After changing a tint in the texture editor, save it and copy it again into every block using that drawing.
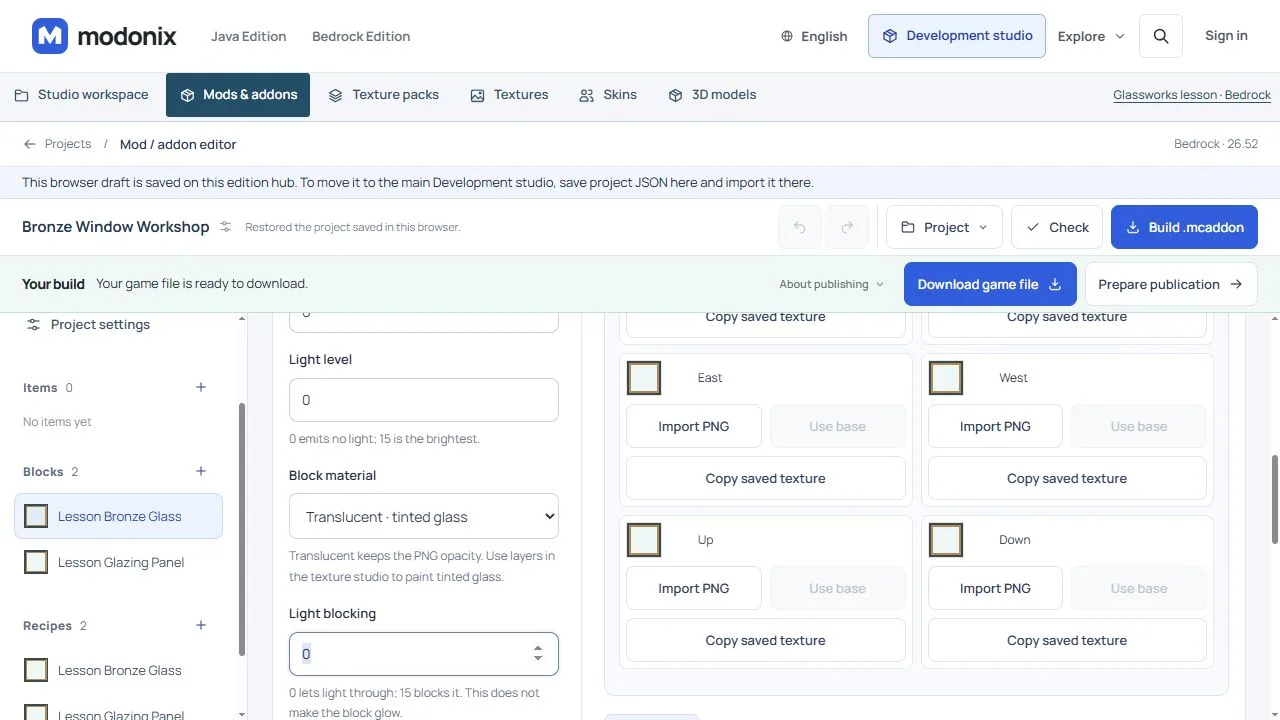
Translucent material keeps the artwork transparency; the window emits no light.
Shape: make a panel from the same artwork
Add Lesson Glazing Panel with the ID lesson_panel, copy the same drawing and keep the same material and light settings. Open “Edit block shape”, select its single cuboid and enter:
| Field | X | Y | Z |
|---|---|---|---|
| Position | −8 | 0 | −1 |
| Size | 16 | 16 | 2 |
Here, 16 units equal one game block side. X and Z are measured from the centre; Y starts at the bottom. The panel fills the block width and height while remaining only 2 units thick. Keep “Automatic” for “Collision” and “Selection”: collision follows the cuboid and selection surrounds the shape. Avoid “No collision” when the panel should act as a barrier.
Rotate the 3D view: the frame should be readable on the wide face and the edge should remain thin. A shared base texture is enough for this first window; leave “Face mapping” unchanged.
Select “Apply shape”, then enable “Face player when placed” in the block settings. The showcase displays the applied shape. “Start rotation” and “Pause rotation” change the camera view while preserving block data. Manual camera controls stop autorotation.
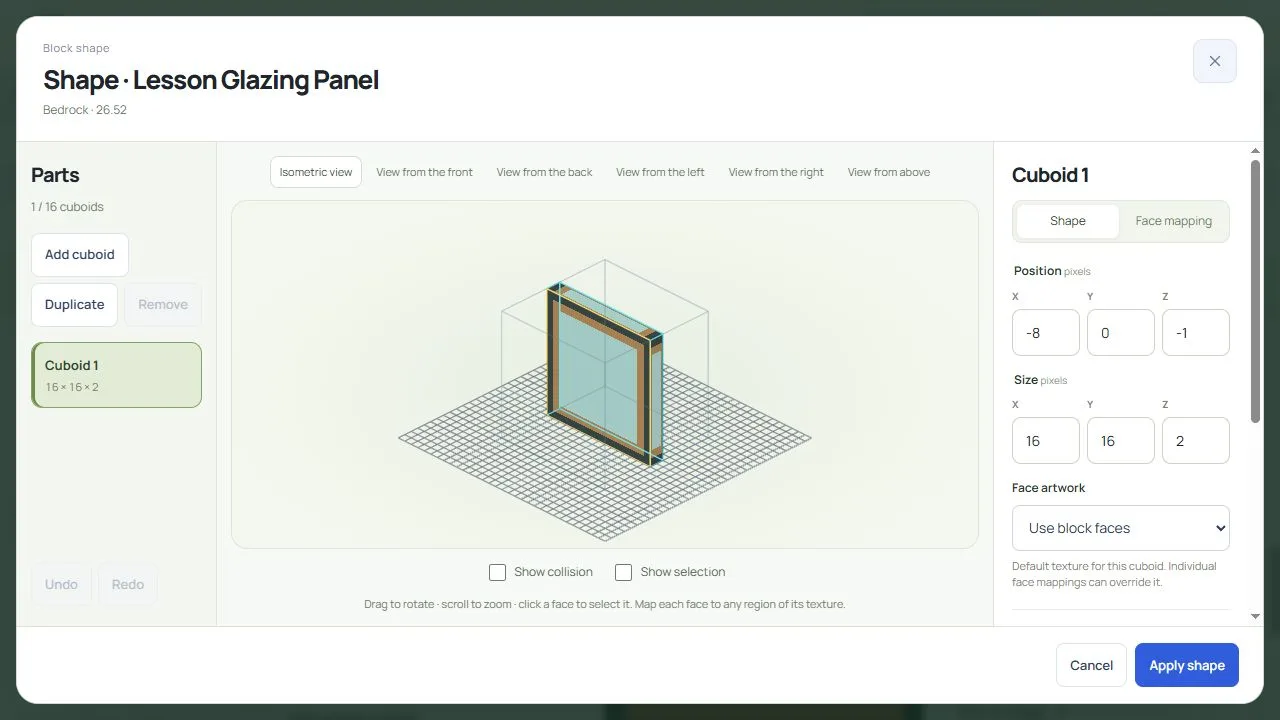
One 16 × 16 × 2 cuboid creates a thin window filling.
Recipe: one material makes four panels
Select “Add recipe”, enter lesson_glass_craft as its ID and choose “Shapeless crafting”. Add four ordinary glass blocks and one copper ingot. Select your Lesson Bronze Glass as the result and set the count to 4. Four repeated ingredients use four separate slots.
Add a second recipe, lesson_panel_cut, and choose “Stonecutting”. Keep one input — your Lesson Bronze Glass — choose Lesson Glazing Panel as the result and set the count to 4. Clear any leftover ingredients if you were editing another recipe.
For the stonecutter input, choose your own Lesson Bronze Glass from this project rather than ordinary glass. Each recipe needs its own ID. Ordinary glass and copper now make the base material, then one base block makes four thin panels.
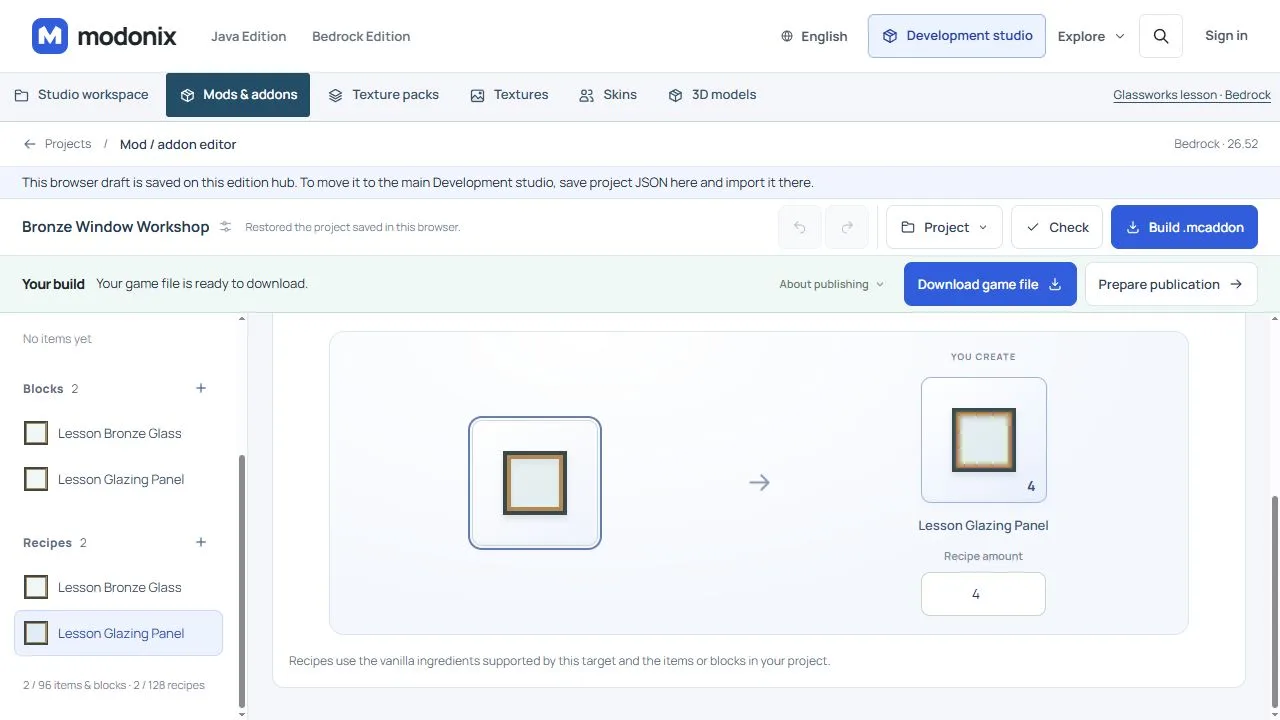
The stonecutter turns one tutorial glass block into four panels.
Save the sources and build the file
Choose “Project” → “Save project JSON”, then build the game file and download the .mcaddon. Keep “Mod / addon” output selected.
The three files have different uses:
- “Download editable project” in the texture editor keeps the artwork layers and their opacity.
- The constructor JSON keeps blocks, finished artwork, shape, properties and recipes. It does not include the artwork layers.
- The
.mcaddoninstalls into Minecraft. Activate both its behavior pack and resource pack in the world settings.
Start in a separate world or a copy of your world. Craft the glass at a crafting table, then select it in the stonecutter to make panels. Place two sides of a corner window, leaving a door or passage beside them. To change a panel's facing, break it and place it from the other side.
The published Glassworks Atelier combines thin panels with masonry and window details. The image below shows the original set; the tutorial drawing is simpler. The building illustrates ways to use the blocks and is not included in the addon.
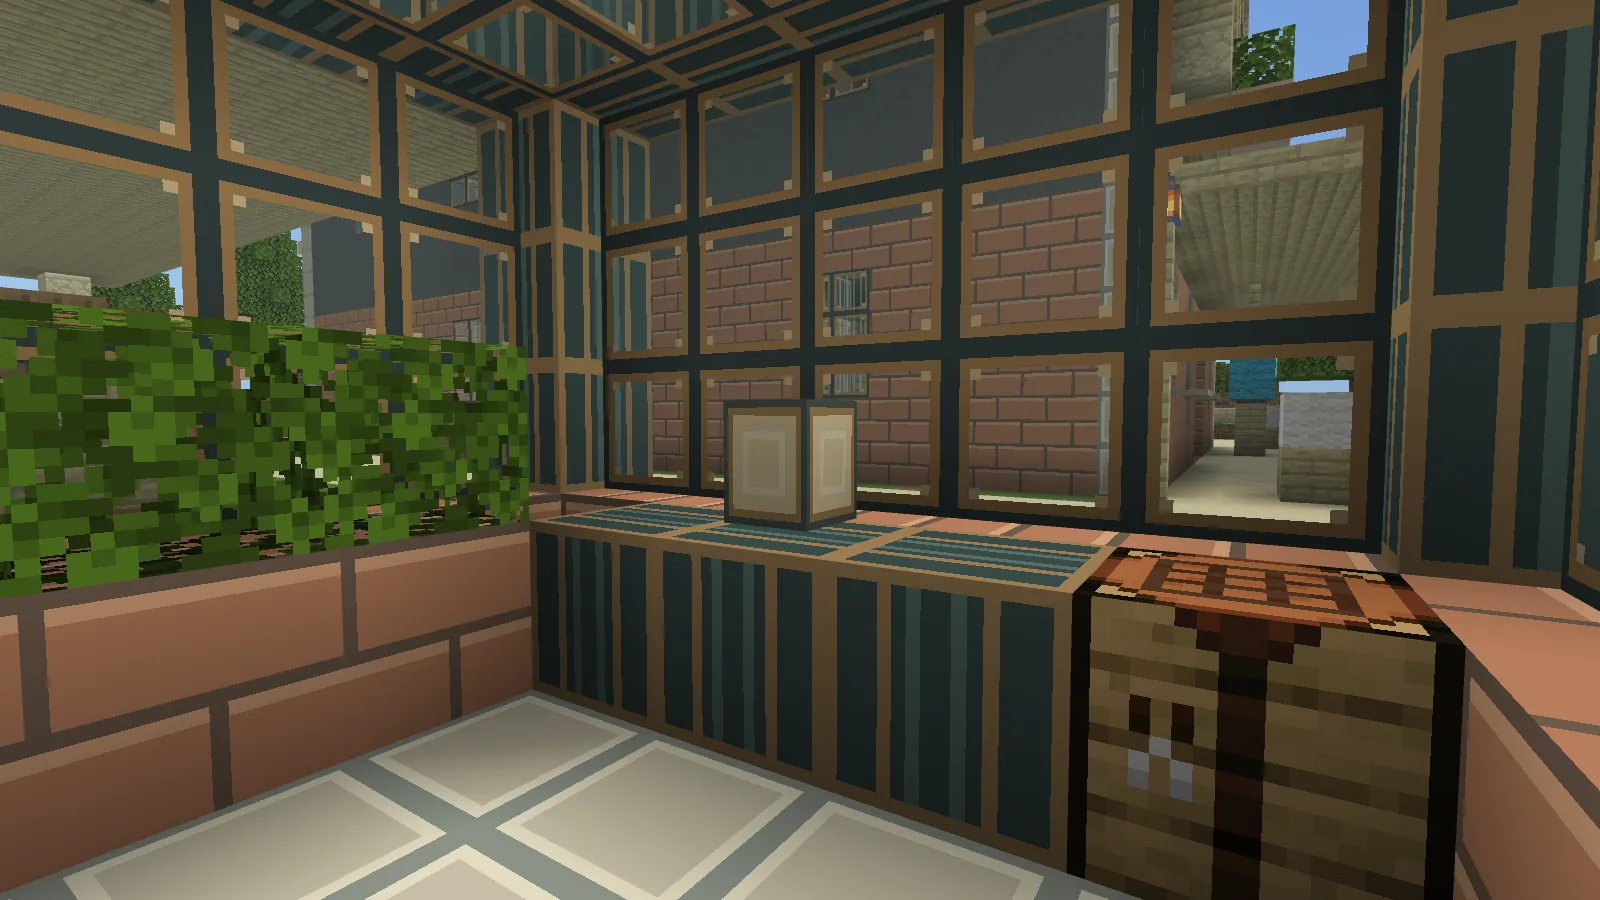
Thin glazing in the original Glassworks Atelier. The tutorial artwork is simpler.
Explore the complete Glassworks project
The example ZIP for this tutorial is for the editors: it contains the original constructor JSON with 12 blocks and 12 recipes, plus eight editable artwork projects retaining their original layers. Bronze Lattice has one layer. These are the original set's editable sources, not an installable addon. The game file and its compatibility are beside the Glassworks Atelier download.
You do not need this ZIP for the first exercise. To explore the full set, save your tutorial JSON first. Open the original sources separately and keep your changes in the tutorial project with its different ID. Layered artwork opens in the texture editor; the addon JSON opens in the constructor. Do not install a modified copy under the identity of the original you already have installed.
Comments 0
Share what worked, ask for help or reply to another player.
Use your Modonix account to join the discussion and manage your comments.
Sign in to commentNo comments yet. Share what worked for you.